INSTRUCTIONS…
- First step for all instructions →
- Adding a new set of project images →
- Batch image editing in Photoshop →
FIRST STEP FOR ALL INSTRUCTIONS:
- Open two browser windows:
– The first should display the page you are editing and therefore want to see a change on – www.sandisonphotography.com
– The second should display the administration screen – www.sandisonphotography.com/wp-admin
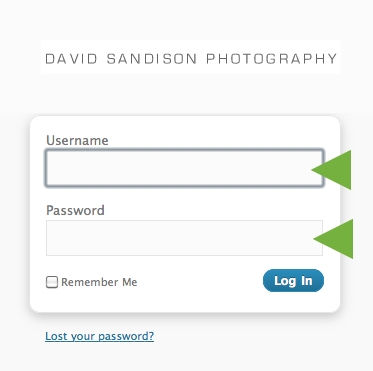
- You have received the login username and password via email.
ADDING A NEW SET OF PROJECT IMAGES:
Adding a new site of project images to the site involves a couple of steps.
– The first step is to upload images to a new project gallery.
– The second is to change the project gallery title & sort order.
– The third is to allocate it to an album.
PART 1 – Upload images to a new project gallery:
- On your computer, assemble the images for the new project. The images should be resized in Photoshop so their height is 1200 pixels tall (same for both portrait and landscape images). The width can be proportional to this. This is the optimal size in terms of screen and file size. This size ensures that the images are large enough to fill the screen when opened in the fullscreen slideshow mode. If your photos are not large enough to fill a canvas of this size, I would suggest a 600 pixel height.
- You can process each image individually or use Photoshop’s batch image editing feature to do a heap at once. View the batch image editing tutorial for information on this. If you are preparing images individually, export them as .jpg files using File > Save for Web. Adjust the quality slider so that you end up with images of around 180-320kb file size. Probably use the ‘High’ quality preset. Any smaller and the quality will be poor; any larger and they will take too long to load. See typical file sizes below:
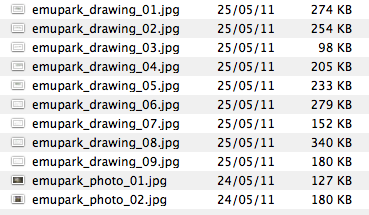
- You may wish to give the files a meaningful name. This is optional, but may help with SEO. I would suggest a format such as ‘projectname_xx.jpg’ with ‘xx’ being a sequential number.
- Create a .zip file of all the photos for the project. In OSX, select the images you wish to zip, right click or control + click, choose ‘Compress’ or ‘Archive’ these items. Ensure that the total size of the .zip file is not above 20MB. If it is, you will need to upload the images in two steps. The name of this zip file will be used as the project title until you override it in the image control panel. You might as well make it relevant to the project at this point.
- Within the WordPress administration area, choose ‘Gallery’ > ‘Add Gallery / Images‘ from the menu on the left-hand side.

- Choose the ‘Upload a Zip-File’ tab.
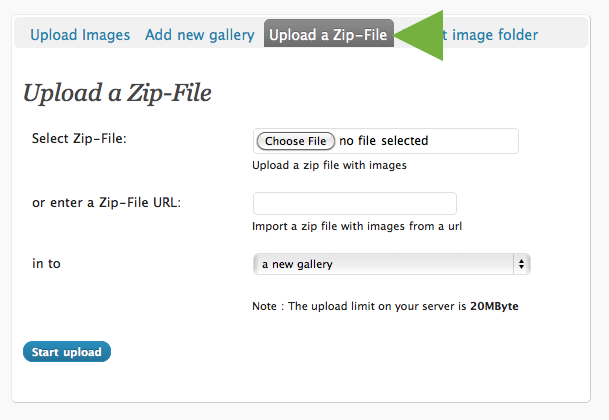
- Choose the .zip file you created and select ‘A new gallery’ in the drop down below. Press ‘Start Upload’.
- The .zip file may take a while to upload depending on your internet connection speed. When it has completed uploading, you will get a ‘creating thumbnails’ dialogue as well as a ‘complete’ message. See examples below:


PART 2 – Change the project gallery title & sort order:
- Now you need to update the project title and sort the photos into order.
Within the WordPress administration area, choose ‘Gallery’ > ‘Manage Gallery‘ from the menu on the left-hand side.

- You should find the gallery you just created at the bottom of the list that will appear. It will be named whatever the .zip file was named. Click on the name and it will take you into a gallery management screen.
- Again, taking Emu Park as an example, you need to update a couple of fields.
– ‘Title’ should be updated with the project name;
– You can add a ‘Description’;
– Don’t edit any of the other settings within the “Gallery settings’ box;
– Further down next to each image you can add a specific title for that image. This isn’t necessary;
– If you would like to exclude an image from displaying on the site, you can tick the ‘exclude’ button;
– When you have made all of your changes, press ‘Save Changes’.

- The final step is to update the sort order of the images. By default they will be listed as per the numbering of the file names.
To update this order, click the ‘Sort gallery’ button.
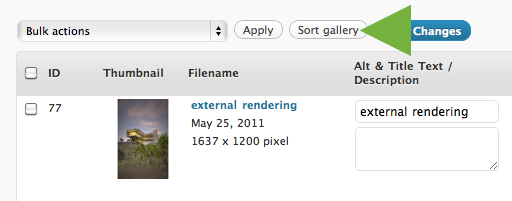
- You will be taken to a screen where you can drag and drop the images from side to side into the order you desire. When you are finished, click ‘Update Sort Order’ and then ‘Back to Gallery’.
PART 3 – Allocate the project gallery to an album:
- Now that you have added a gallery, we need to allocate it to one of the album categories.
Within the WordPress administration area, choose ‘Gallery’ > ‘Album‘ from the menu on the left-hand side.

- You will see a ‘Select album’ drop down menu. Choose the one you want manage / add the new project gallery too. Lets choose ‘Architecture’ for this example.
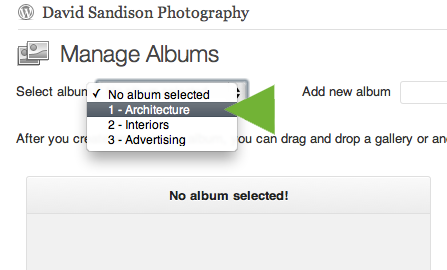
- You will then see three columns of information. We are concerned with the first two. The first column ‘Album ID1: Architecture’ lists all the project galleries already in that album. The second column lists those project galleries that are not in that album. You can drag and drop from one (1) to the other (2), adding and removing project galleries. When you are done, press ‘Update’ (3).

- You should see your changes reflected on the live site now.
BATCH IMAGE EDITING IN PHOTOSHOP:
- Arrange all the images you want to covert into a single folder.
- Create another folder near by called ‘Converted’.
- First we need to record the conversion action. Open the Actions palette: Windows > Actions.
- Open one of the files from the folder of images that needs to be converted.
- Go to the Actions palette and click on the new action button.
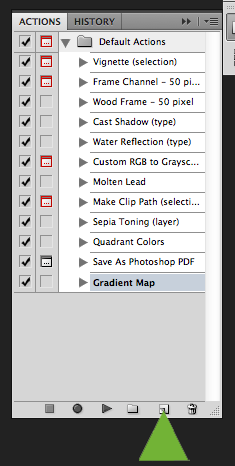
- A new action creation window will popup. You can name the action if you like. Then press ‘Record’.
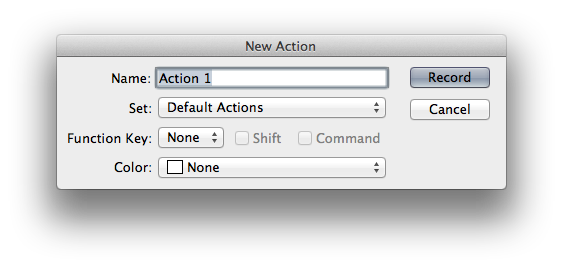
- Photoshop is now recording everything you do.
- Go to the window where the image you opened in step 4 is sitting.
- In the menu, click File > Save for web
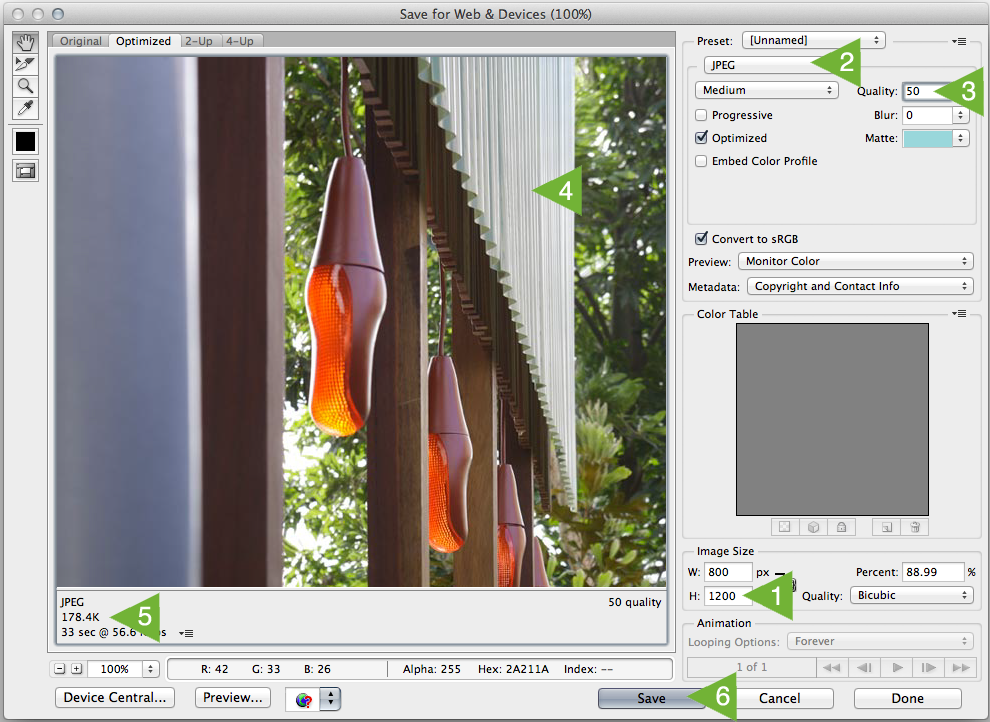
- You will get a large popup window like the one below. If there are any warning, just click ignore. There are a number of settings to adjust in this window.
– (1) Firstly make the height 1200px. Do not adjust the width;
– (2) Ensure the file type is ‘JPEG’;
– (3) Adjust the quality to 50 or 60;
– (4 & 5) Take note of the displayed image quality and file size. You want the file size to hover around 180-320kb. Make adjustments to (3) to get these qualities right.
– (6) Save > Choose the location of the ‘Converted’ folder you setup in step 2.
- The ‘save for web’ window will close. The last thing to do is close the original image you had opened. It may ask if you you want to save any chances. Click ‘No’.
- The last step is to stop the action recording. There is a ‘Stop’ button at the bottom of the Actions palette.
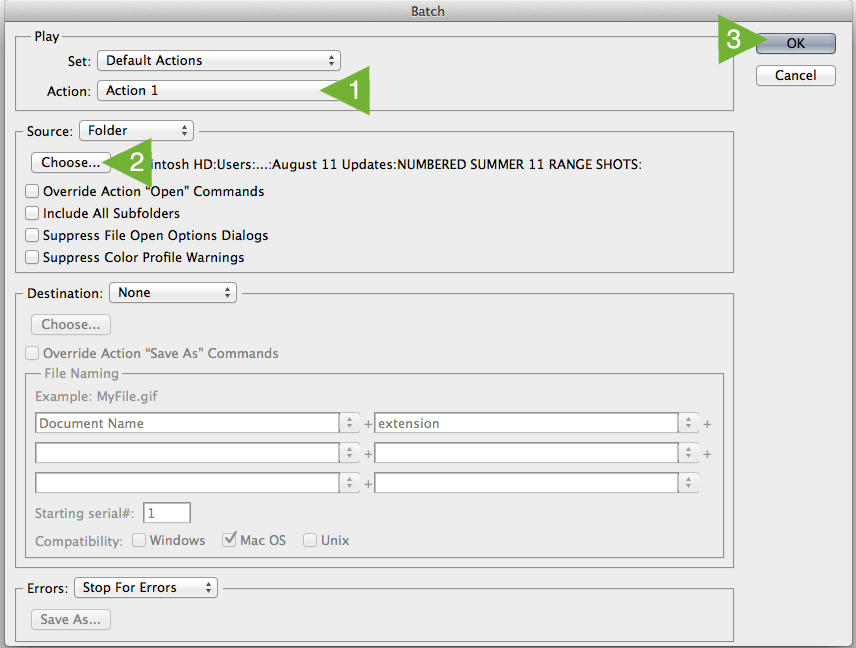
- Now we can batch apply this recorded action to the entire folder of images. Go to File > Automate > Batch.
- The following window will open up.
– (1) Choose the action we created in step 6;
– (2) Choose the source folder of images you want to cover.
– You can override the output folder location if you wish under ‘Destination’;
– (3) Pressing ‘OK’ will run the script.
- You now have a converted folder of images ready to be zipped up into separate projects as per the instructions in ‘Adding a new set of project images‘ .